Mantle 2.0 Guide: Plans
Overview
A Plan combines Network Builds, Datacenter Builds, and Flows into ordered steps for one or more Mantle appliances. Configure the steps, save an unfinished draft, and deploy when each step is ready.
Plans and their resulting Builds and Flows appear on Dashboard → Operations. Plan drafts are on Dashboard → Drafts. DAG authoring drafts are separate, under Assets → Drafts.
Before deploying, prepare the required assets, licenses, connections, and appliance settings. See Build Management and Inventory and Kit Configurations.
1. Create a Plan
- Open Dashboard in the Mantle scope.
- Select New deployment → Plan.
- Drag Network Build, Datacenter Build, or Flow from the left library onto the graph. A local target is created when needed.
- Add Local Target or Remote Target when another execution target is required. Select the connected Remote Node for remote work.
- Add the required steps to each target. Mantle orders them as Network Build → Datacenter Build → Flow, omitting types you have not added.
- Use the edit control next to a step in Plan summary to open its configuration form. Configure and validate it using the same controls as an individual Build or Flow.
- Optionally enter a Kit ID for deployment tracking.
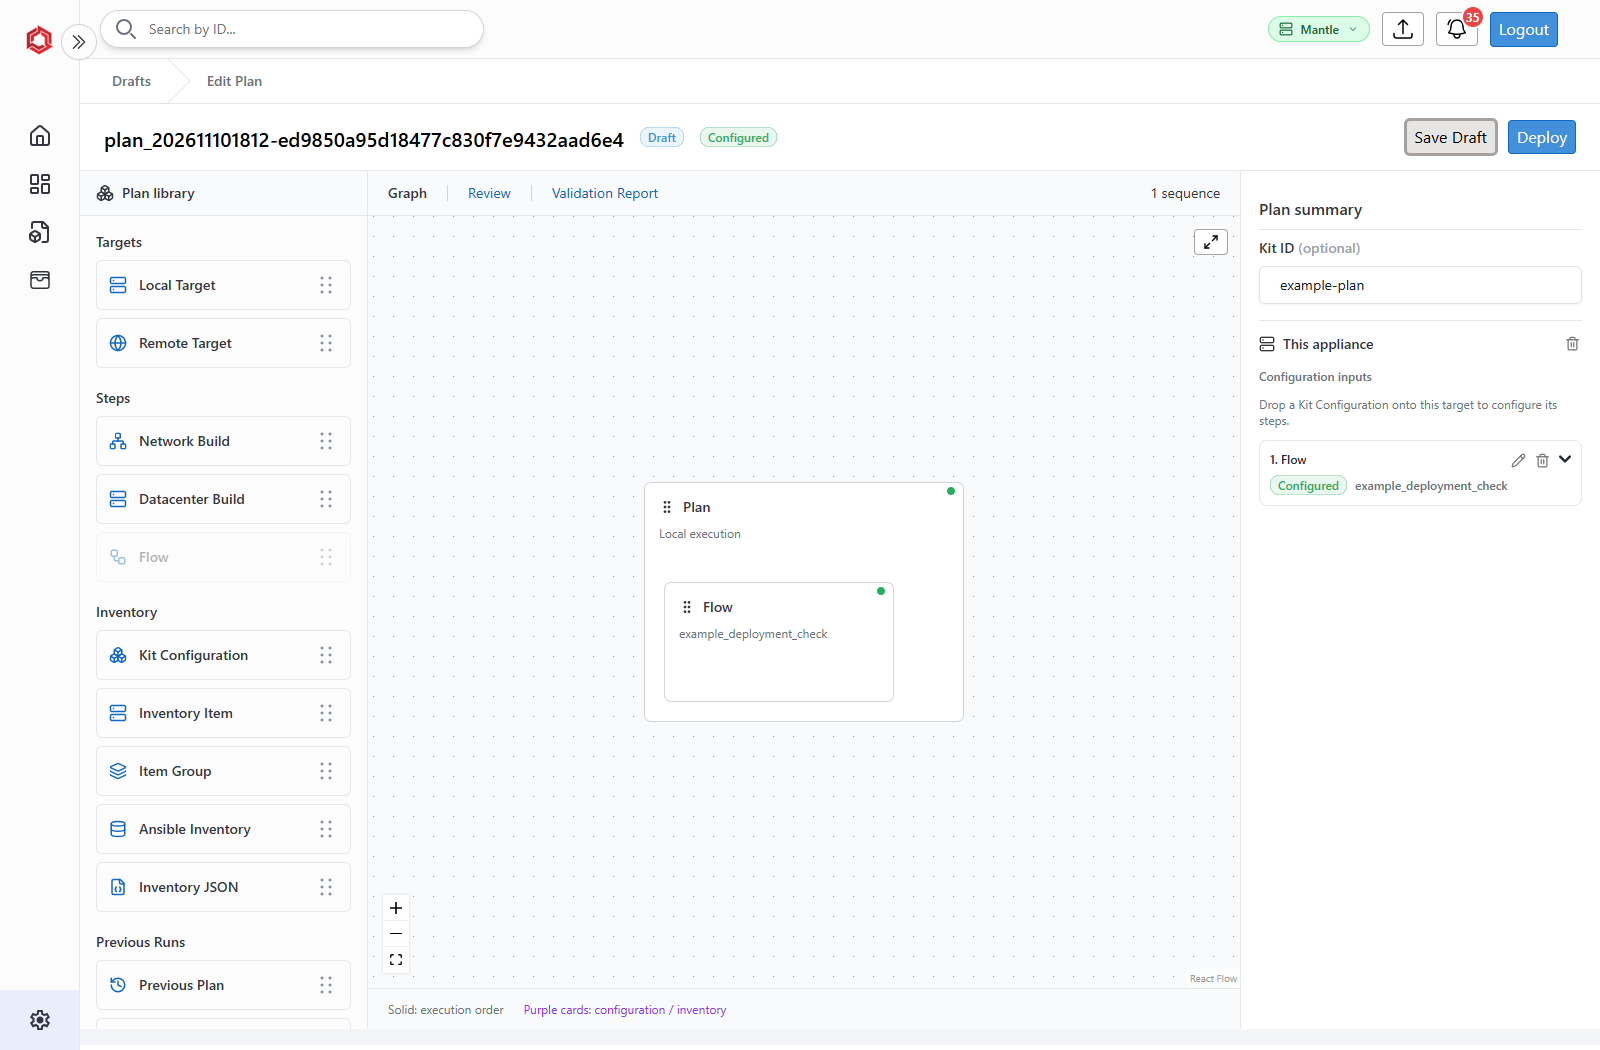
Mantle generates the Plan ID. Kit ID is an optional tracking value, not a separate Plan name or required group assignment.
Steps run in order within each target. Separate targets can progress independently; placing targets beside one another does not make them a single ordered queue.
Each target supports at most one Network Build, one Datacenter Build, and one Flow. Each appliance can appear only once in the Plan, including the local appliance. Keep its steps together under one target. Moving a target changes the graph layout, not the execution order.
Set up a remote target
- Drag Remote Target onto an empty part of the graph to add another target, or onto an existing target to change its destination.
- In Plan summary, select Group if you are not already working in a group.
- Choose Remote Node before configuring the remote steps. The list contains Mantle appliances registered in that group and excludes nodes already assigned elsewhere in this Plan.
- Drop the required Build or Flow steps onto that target, then open each step's configuration.
If the node is missing, register it using Parent Node Registration. Check the connection before deployment.
Remote Network steps use the selected appliance's serial ports. Build asset choices also follow the selected target and its group. A port or asset available for local work may not be available for a remote step. Changing a target requires its steps to be validated again.
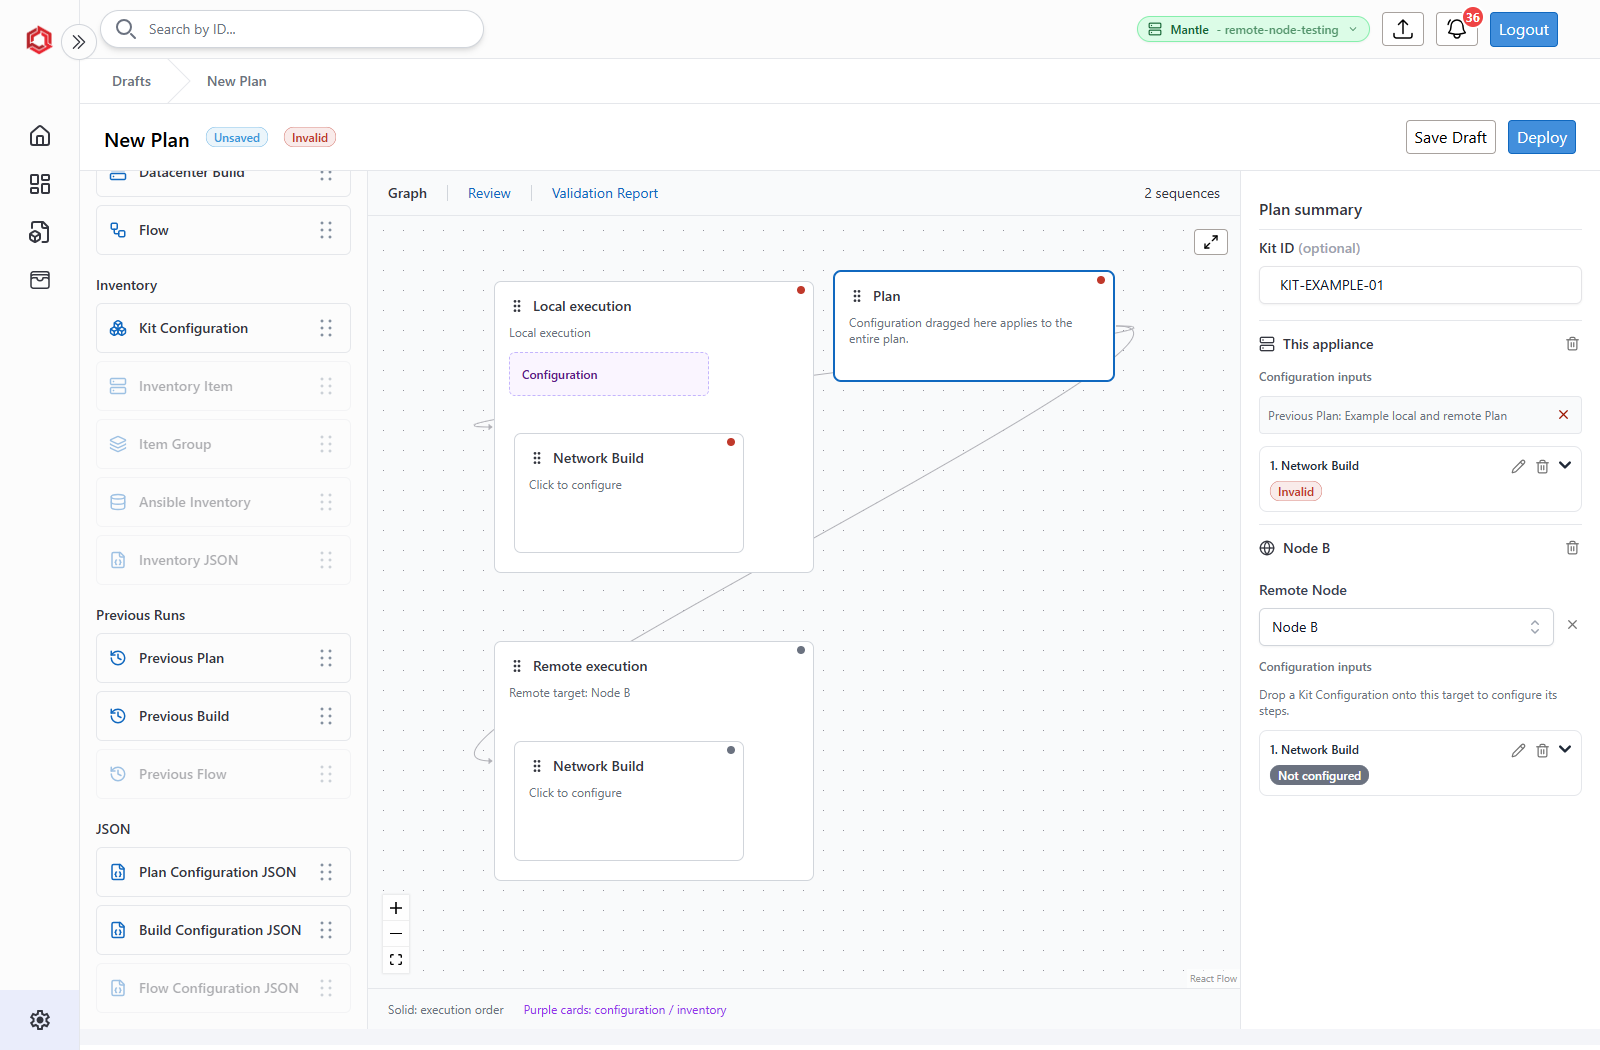
In this example, This appliance and Node B have separate Network Build steps. Configuring one does not configure the other.
2. Reuse configurations and inventory
Drop a source from the library onto a compatible target or step, then complete its selection or import dialog.
| Source | Use |
|---|---|
| Kit Configuration | Apply saved host, platform, network, and Flow configuration to a target. |
| Previous Plan, Previous Build, Previous Flow | Review and reuse an earlier deployment's settings. |
| Plan Configuration JSON, Build Configuration JSON, Flow Configuration JSON | Import a configuration exported through the application. |
| Inventory Item, Item Group | Supply systems from Inventory to a Flow. |
| Ansible Inventory, Inventory JSON | Supply variables to a Flow. |
Mantle restricts incompatible destinations. Review the summary after applying a source, especially when replacing configuration or combining inventory inputs. A Kit Configuration supplies reusable setup; a Kit ID provides tracking information.
Choose where configuration applies
- Drop a Kit Configuration onto a target to supply compatible settings to its steps, or onto a particular step to configure that step.
- Drop Build Configuration JSON or a matching Previous Build onto a Build step to supply its starting configuration.
- Drop Flow Configuration JSON or Previous Flow onto a Flow step to reuse its DAG and saved setup. A Build source dropped onto a Flow supplies inventory variables instead of replacing its DAG.
- Previous Plan and Plan Configuration JSON can replace the whole Plan or a target. Review the replacement confirmation before continuing.
A step uses its own compatible configuration source before one inherited from its target or saved Plan defaults. Values explicitly edited and saved in the step form override its inherited configuration. Review each affected step after changing or removing a shared source; it must pass validation again.
When adding a step to a target that already has a compatible Kit, Apply Kit Configuration? offers Apply Kit or Add Without Kit. Select Platform or Flow Configuration when prompted. Add Without Kit adds the step without inheriting that Kit; you can configure it separately afterward.
Order Flow inventory inputs
Open the Flow step in Plan summary to inspect Configuration inputs. Sources inherited from a target or saved Plan defaults identify their owner.
- Add the required Inventory Items, Item Groups, Ansible Inventory, or JSON sources to the Flow step.
- Drag the input reorder handles to set priority. The top input wins when sources supply conflicting values.
- Open the Flow configuration to review resolved values and make any manual edits. Manual edits override all inputs.
- Save the step and review its validation status.
Removing an inherited input from one Flow excludes it from that step without removing the shared source from other steps.
3. Save and reopen a draft
- Select Save Draft in the editor.
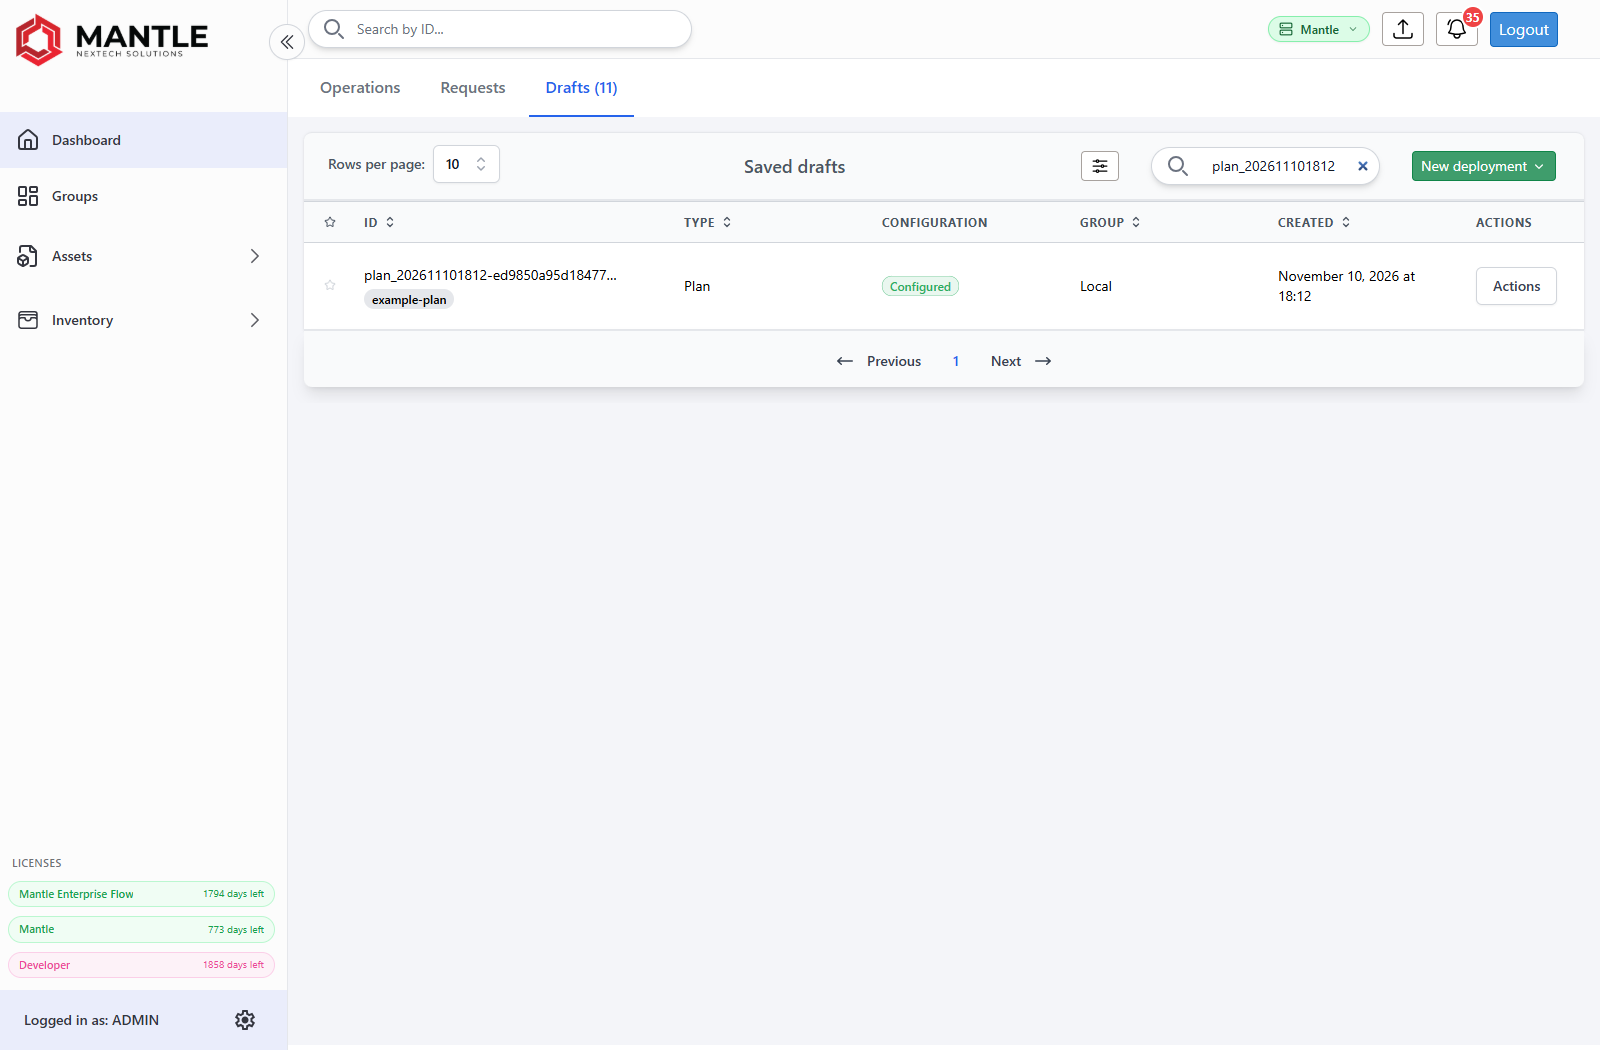
- Open Dashboard → Drafts.
- Open the saved Plan and continue editing.
Draft saving preserves incomplete work on the appliance. Deployment validation still has to pass before execution. After dispatch begins, use the tracking page rather than the draft editor.
4. Review and deploy
- Select Deploy in the editor.
- Resolve issues shown in the summary or step form.
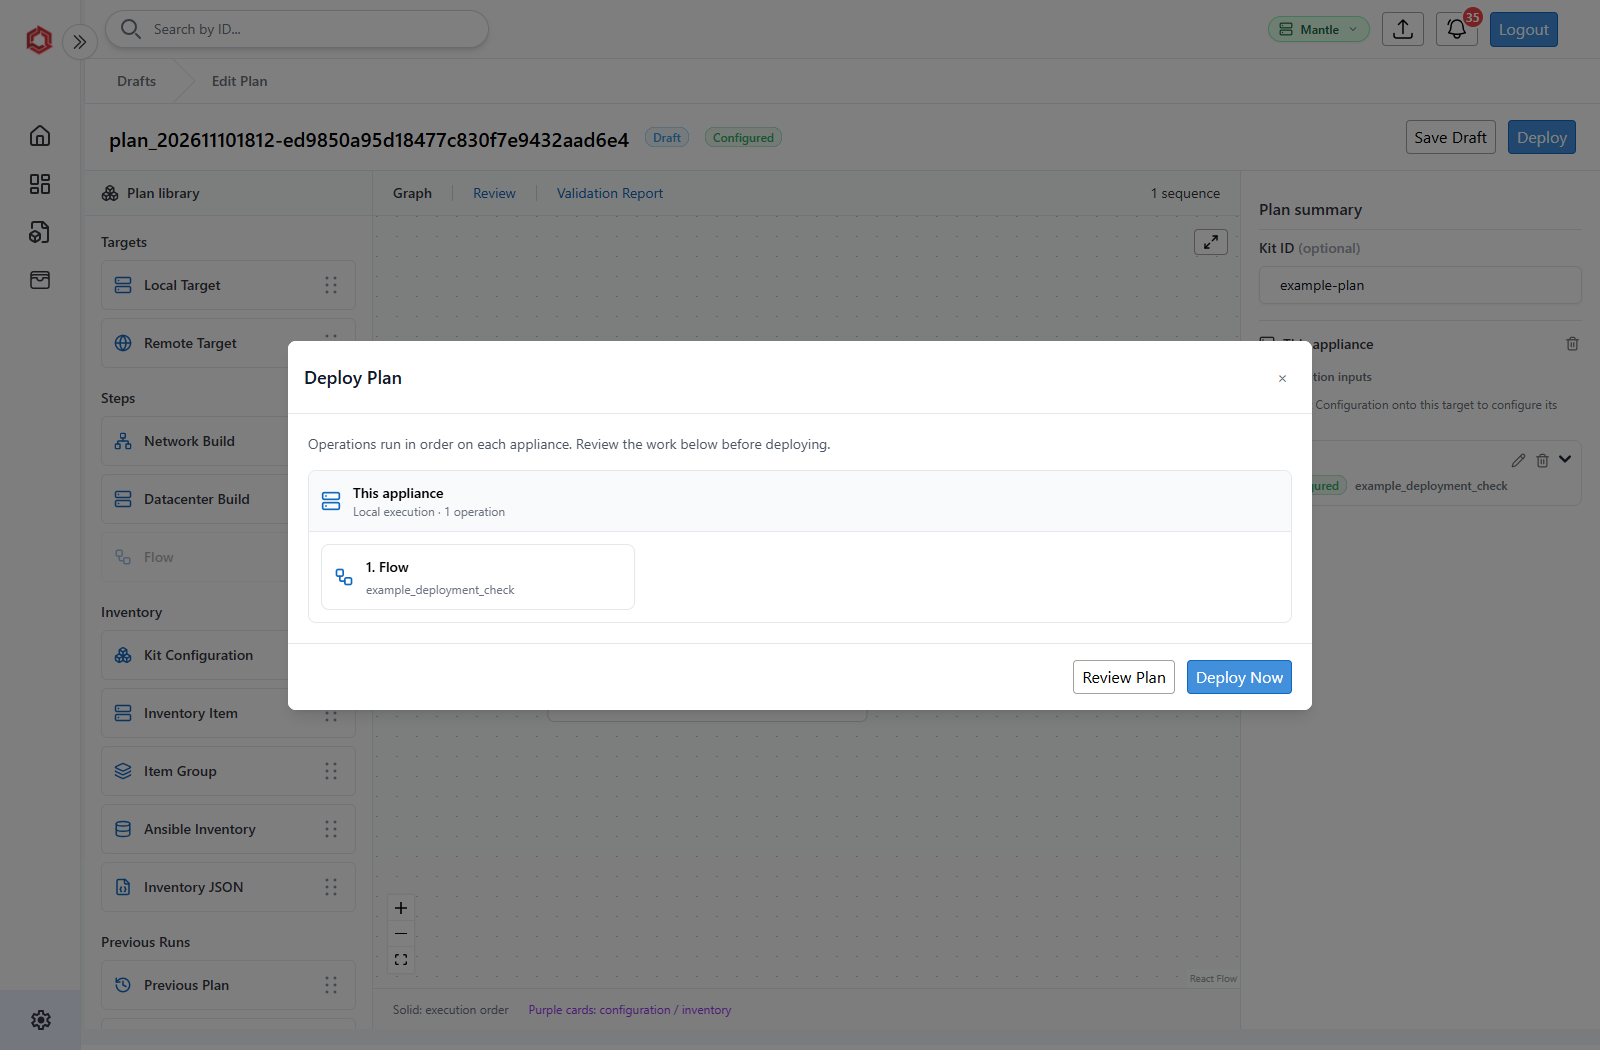
- In Deploy Plan, review each appliance and its ordered operations.
- Select Review Plan to return to editing, or choose a deployment action.
| Action | Result |
|---|---|
| Deploy Now | Starts work on local and selected remote appliances. |
| Send Action Requests | Starts local work immediately and sends remote work for acceptance on the receiving appliances. Available when the Plan has remote targets. |
Local work does not wait for remote acceptance. Remote work may remain waiting until the receiving appliance accepts it. Check connectivity, group access, licenses, and required assets if remote work cannot begin.
Resolve validation errors
The Plan and step badges describe configuration readiness, not execution progress:
| Badge | Meaning |
|---|---|
| Configured | The current configuration has passed validation. |
| Not configured | The step has not passed validation, or a target still needs its destination or steps. |
| Invalid | Validation found configuration errors. |
- Select Validation Report in the editor. An incomplete Plan also opens this tab when you select Deploy.
- Find the affected target and step in the report's section headings. Check Label, Value, and Issues for the fields that need attention.
- Use the step's edit control in Plan summary to open its form. Correct the values, complete the form's review, and select Save Step.
- Confirm that the step is Configured. Repeat for every unfinished step and target, then select Deploy again.
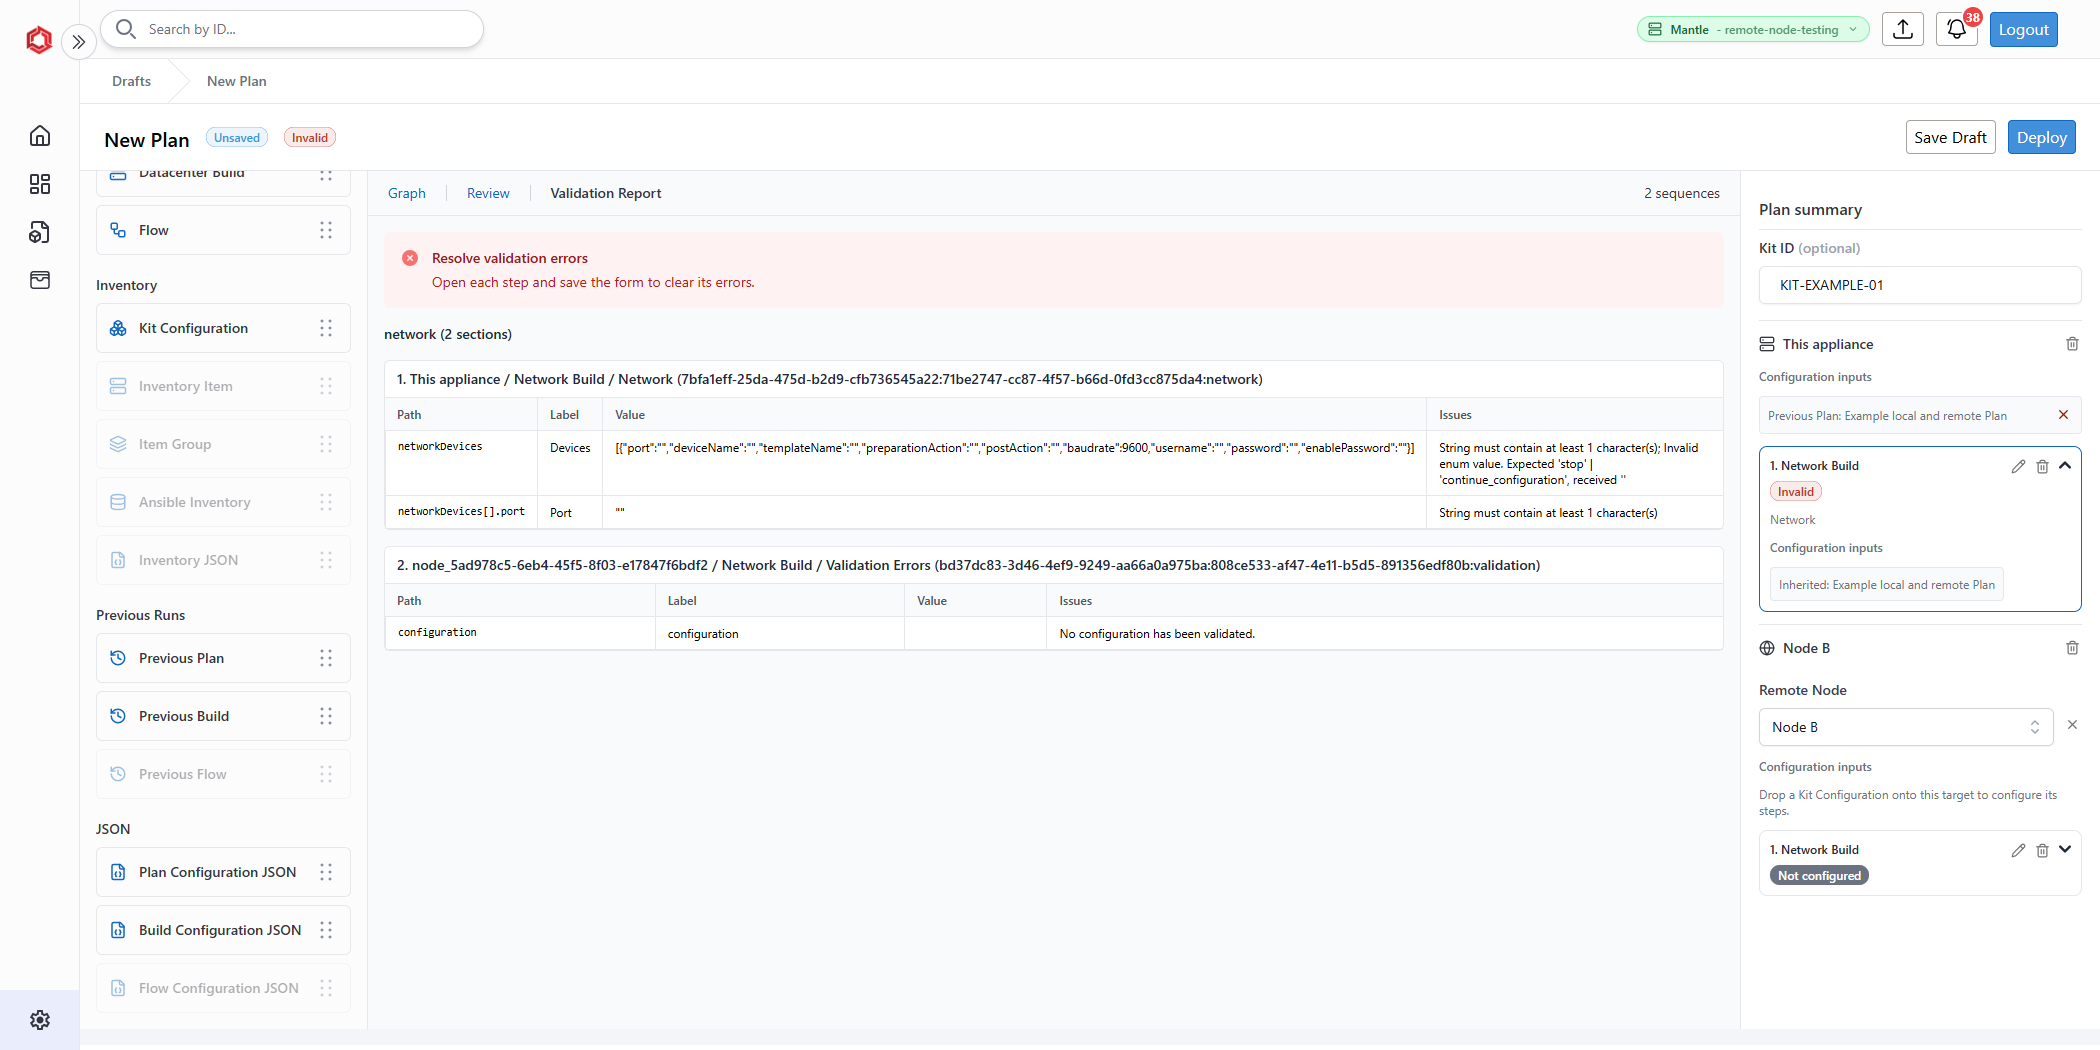
The example's local Network Build has an empty Port, while the remote step reports No configuration has been validated. Select the local port in the local step's form, then configure the remote step with Node B's port and device settings.
Deployment refreshes current target resources and revalidates the steps before starting, including configurations loaded from saved Plans. If a referenced port, asset, or other selection is unavailable, correct that step and try again. If the Plan changes during validation, review it and deploy again. Save Draft remains available for unfinished work.
5. Track execution
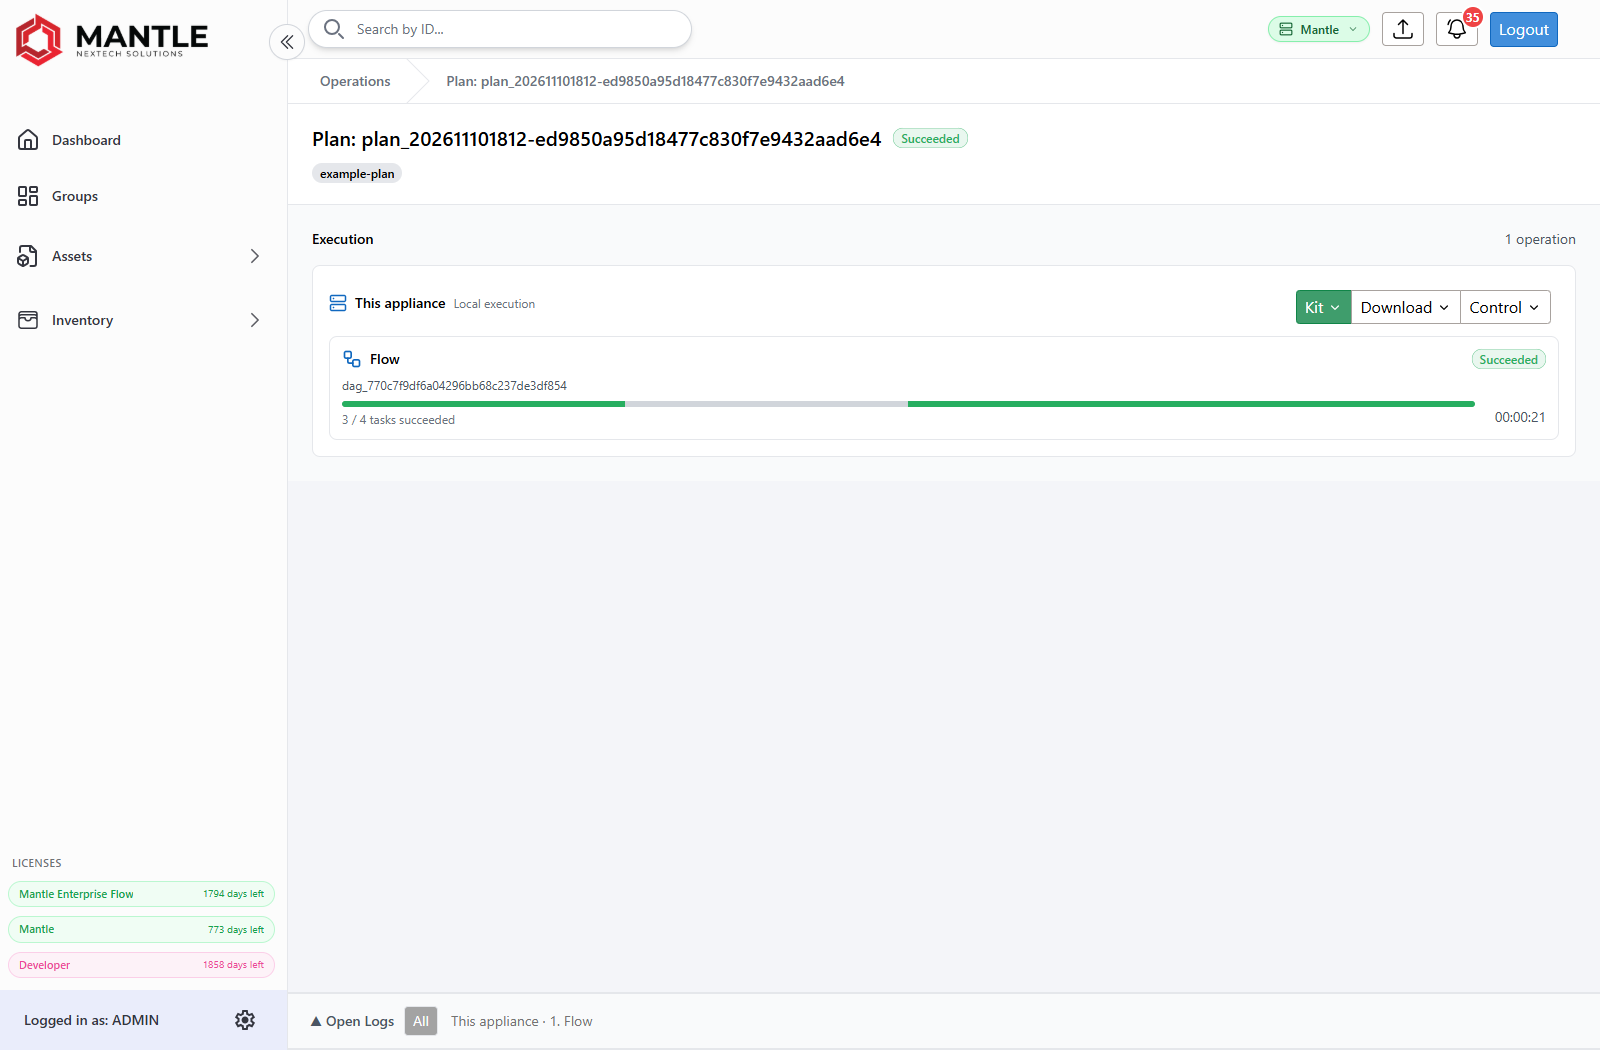
Open the Plan from Dashboard → Operations. Use Active for current work and History for earlier runs. The tracking page shows each appliance, step status, and links to the associated Builds and Flows.
| Control | Behavior |
|---|---|
| Pause | Requests a pause before the next step; it does not suspend the currently running Build or Flow task. |
| Resume | Continues a paused Plan. |
| Cancel | Requests cancellation. Review later status updates to confirm the outcome, especially for disconnected remote appliances. |
Use Download for the Plan object, Plan steps, and audit events where your account has access. The Change Log provides execution output. Open an individual Build or Flow for detailed task logs.
6. Access and older records
Actions depend on account permissions and product licenses. A group is optional. Grouped Plans use the applicable group roles; ungrouped Plans still enforce privileged actions such as deletion and audit access.
Review older configurations before reuse. Legacy Virtual Network configurations use Datacenter Builds, and retired types may need recreation in current forms. Historical Playbooks Builds remain readable but cannot be rebuilt as new standalone Playbooks Builds. Use a Flow for that automation.